Setting Up Your E-mail in Microsoft Entourage
This tutorial shows you how to set up Microsoft Entourage to work with your e-mail account. This tutorial focuses on setting up Microsoft Entourage 2003, but these settings are similar in other versions of Microsoft Entourage. You can set up previous versions of Microsoft Entourage by using the settings in this tutorial.
To Set Up Your E-mail Account in
Microsoft Entourage
- Open Microsoft Entourage 2004.
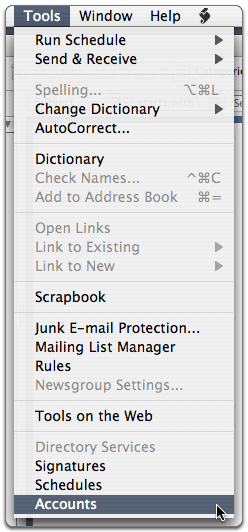
- Select Tools > Accounts.
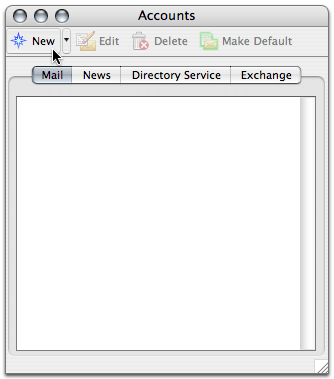
- Click “New.”
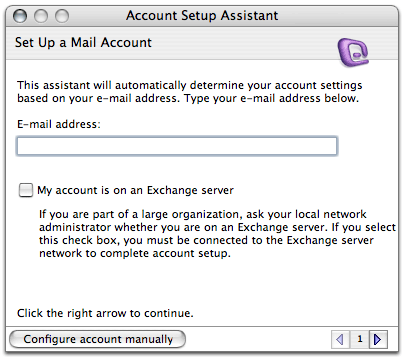
- If the “Account Setup Assistant” window displays, click “Configure account manually.”
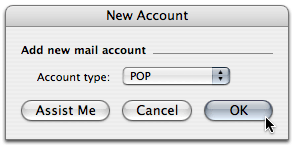
- Select POP for the account type and click OK.
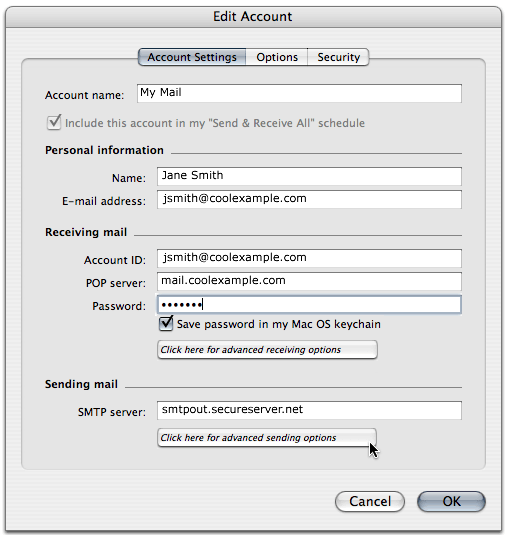
- On the Edit Account window, enter your information as follows:
Account name
Enter a name for your account, for example: My Mail, Work, or Home.
Name
Enter your first and last name.
E-mail address
Enter your e-mail address.
Account ID
Enter your e-mail address, again.
POP server
Your incoming server is pop.nugardt.com, where “nugardt.com” is the name of your domain.
Password
Enter the password for your e-mail account.
SMTP server
Your outgoing server is smtp.nugardt.com, where “nugardt.com” is the name of your domain.
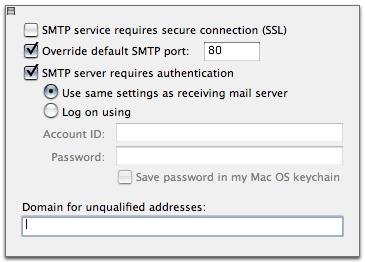
Click “Click here for more advanced sending options.”
- Select “Override default SMTP port” and change the number to 26.
- Select “SMTP server requires authentication” and “Use same settings as receiving mail server .” Click OK.
Setting Up Your Apple Mail
This tutorial shows you how to set up Apple Mail to work with your email account.
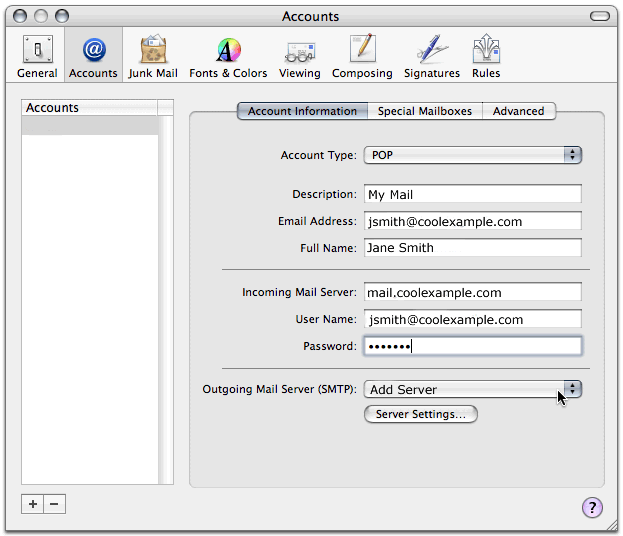
To Set Up Your Apple Mail
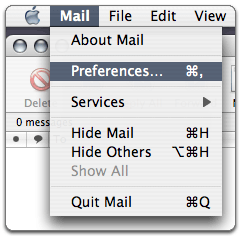
- From the Mail menu, select Preferences.
- Select the Accounts tab, and click the plus sign(+) at the bottom of the Accounts box.
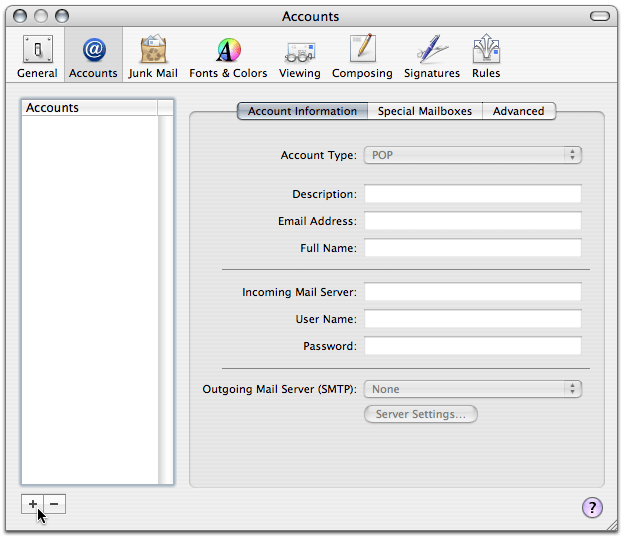
- In the Account Information screen, select POP from the Account Type list, and enter your information as follows:
Description
Enter the name of your account.
Email Address
Enter your email address.
Full Name
Enter your name.
Incoming mail server (POP3)
Your incoming server is pop.nugardt.com, where “nugardt.com” is the name of your domain.
User Name
Enter your email address.
Password
Enter the password you set up for your email account.
Outgoing Mail Server (SMTP)
Select Add Server from the list.
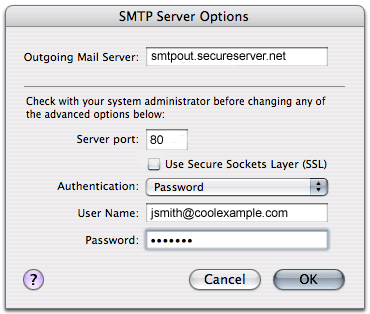
- When the SMTP Server Options window displays, type smtp.nugardt.com, where “nugardt.com” is the name of your domain, in the
Outgoing Mail Server field and change the Server Port setting to 26.
- Under the Authentication list, select Password and enter your SMTP user name (full email address) and password.
- Click OK.
|